
- This feature is only applicable to Facebook campaigns on mobile devices.
- The supported Facebook campaign objectives include:
- Traffic
- Conversion
- Catalog Sales
- Store Traffic
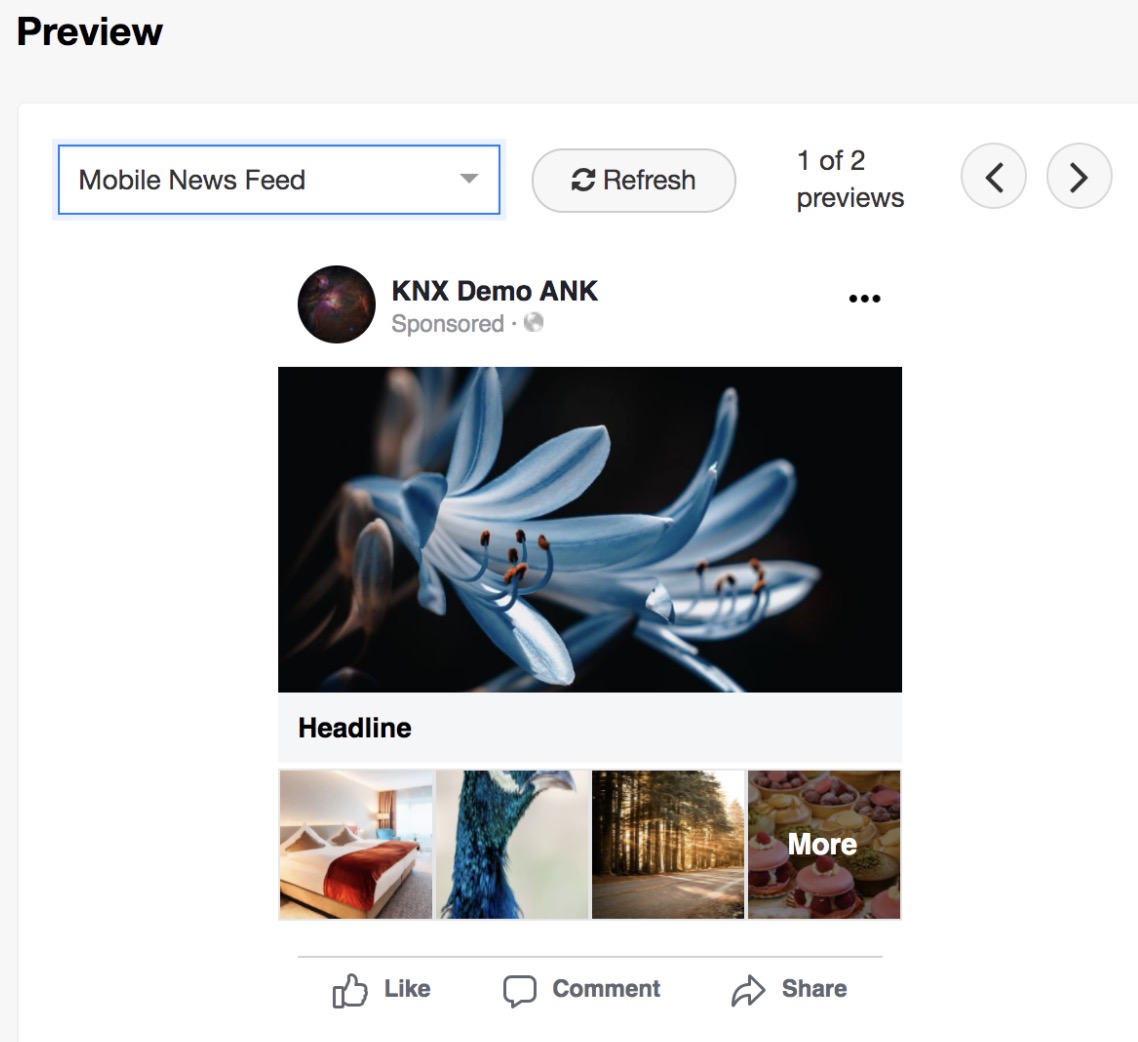
Facebook Collection Ads are grid-based photos that make it easy for prospects to discover, browse, and purchase products and services directly from their phone. Each ad showcases a hero image or video with four featured products positioned underneath. When prospects click on your ad, it will enlarge into a full-screen view that enables them to browse the entire catalog.
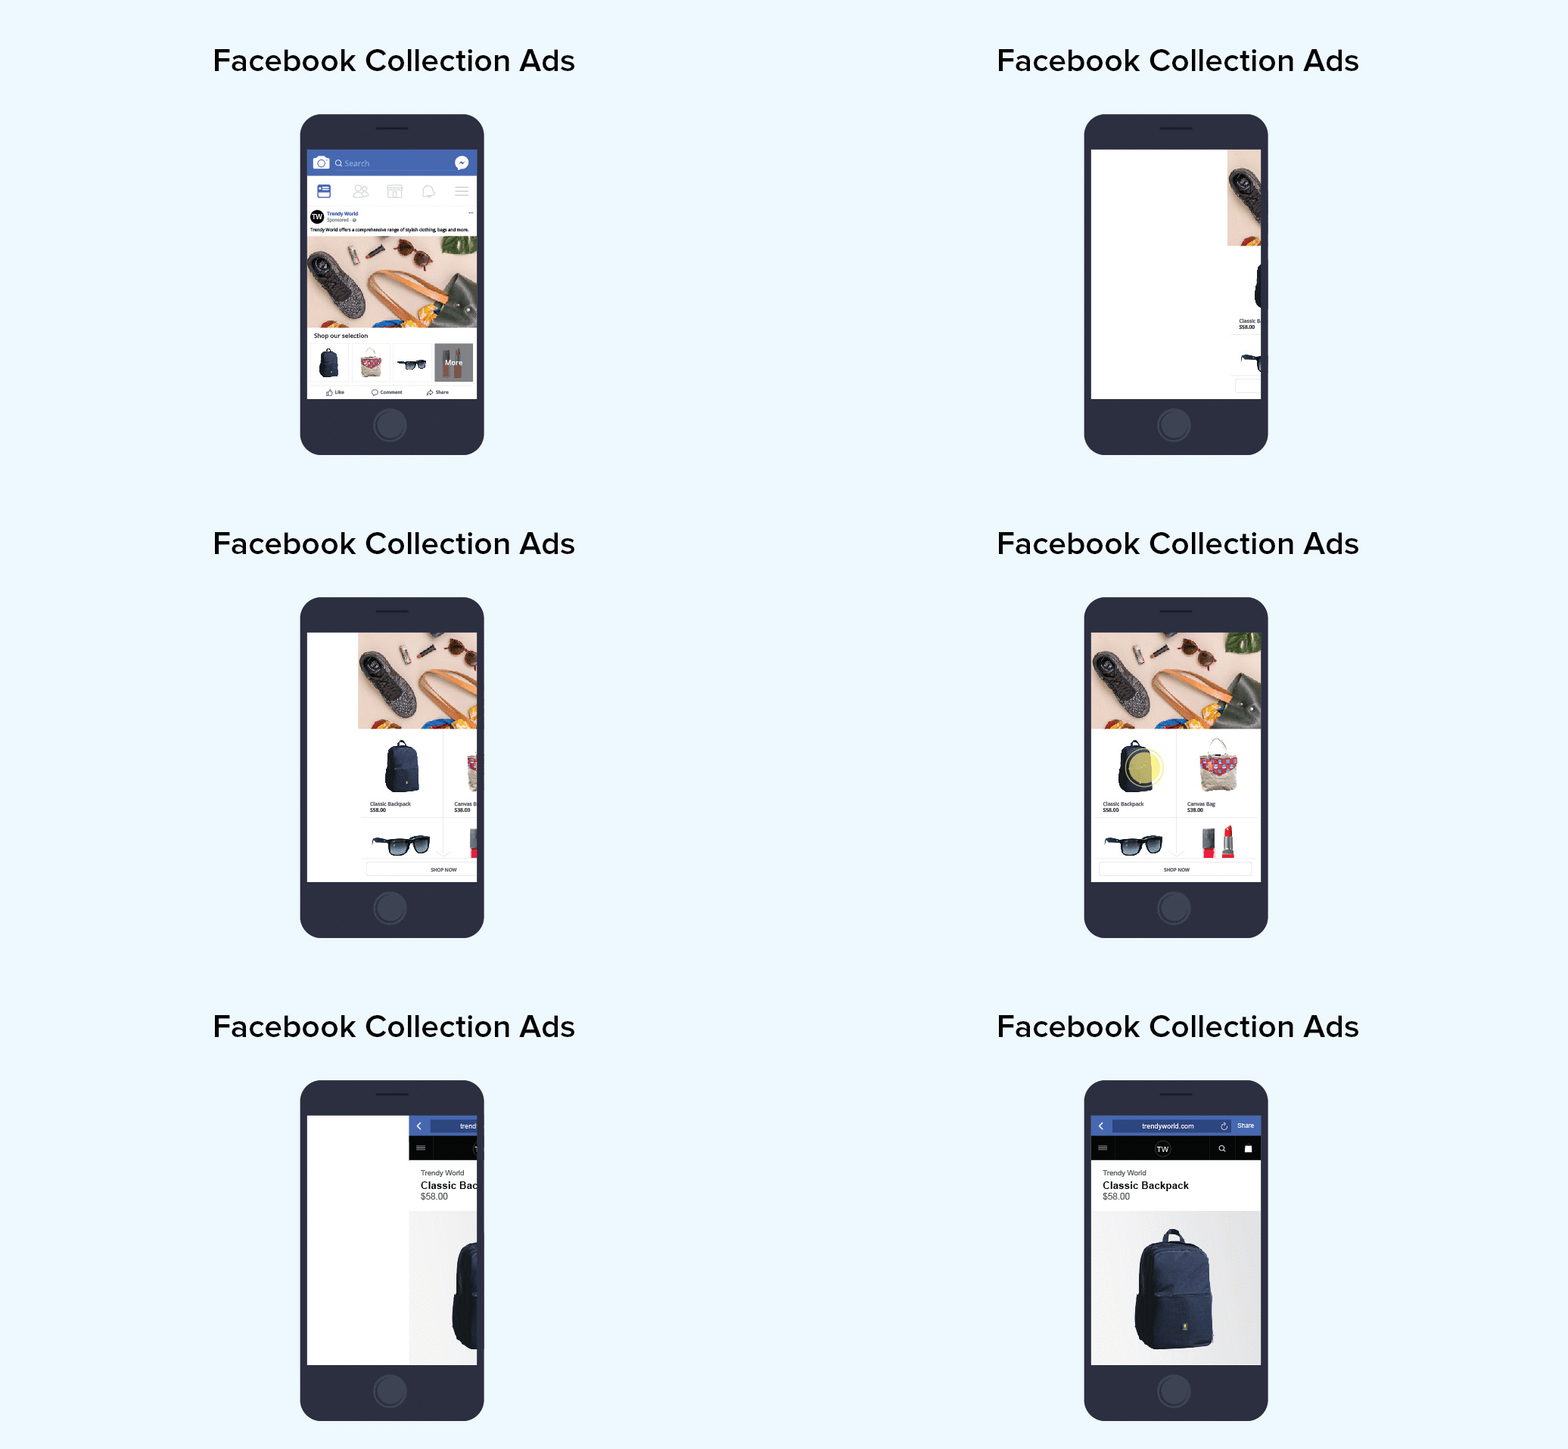
Using Facebook’s Collection Ads in MediaPath allows you to
- Drive product discovery on mobile devices to increase engagement and sales conversion.
- Deliver a seamless and enjoyable browsing experience by including interactive elements (e.g. tapping ) to engage your prospects through every stage of their customer journey.
- Showcase your brand by highlighting your products/services with visually appealing media. These marketing strategies are especially effective for retail, e-commerce, and travel industries.
Instructions #
1. Follow this guide to set up a Facebook creative. For step 2, select Meta Ads > Collection Ad.
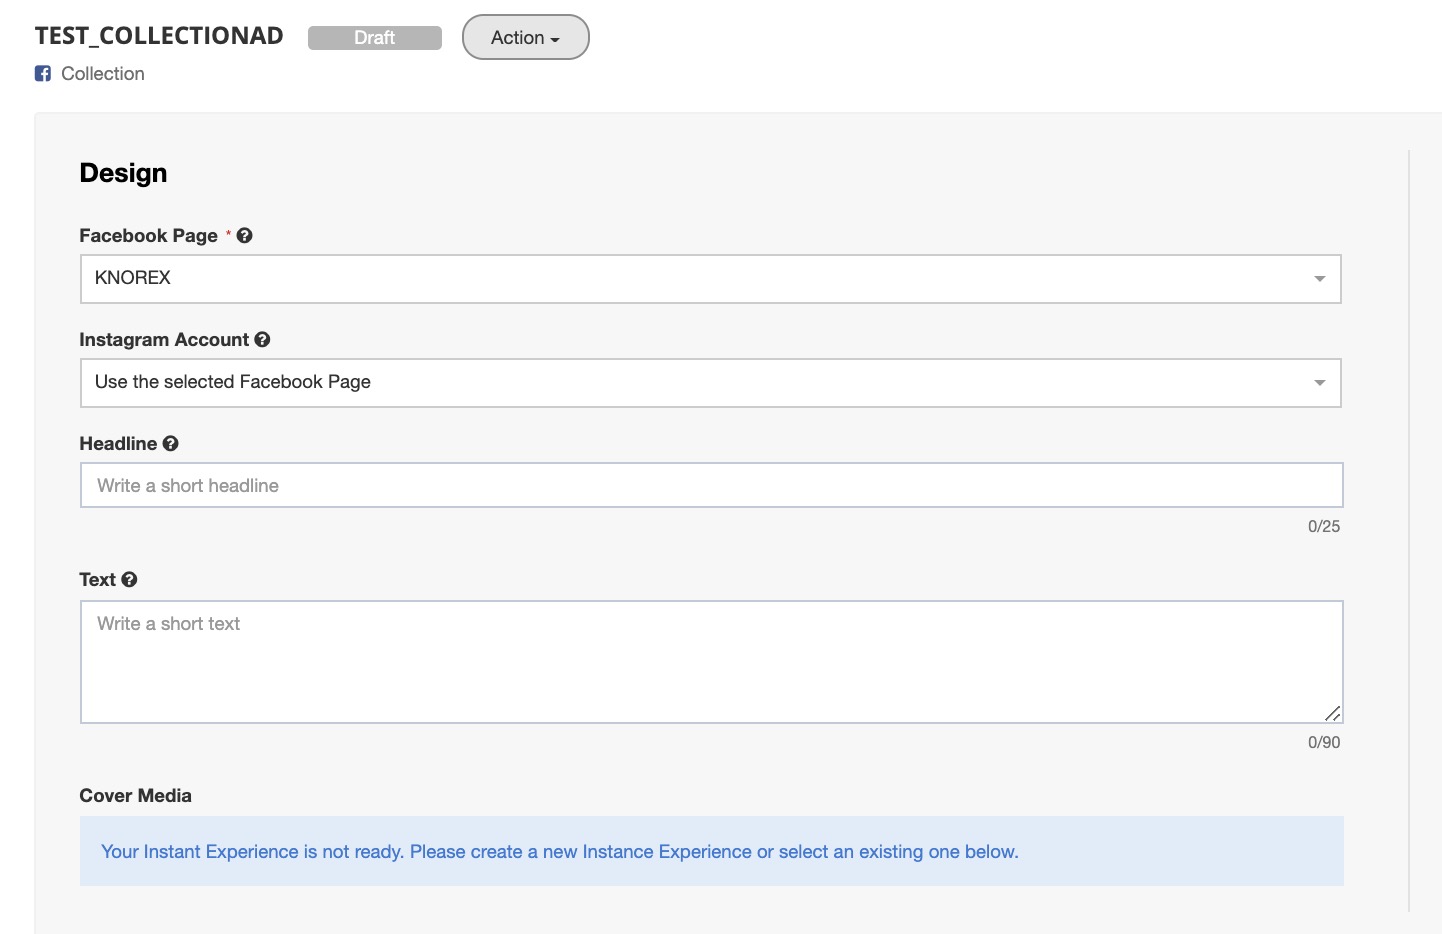
2. Once you’ve launched the new creative design form:
- Select the Facebook page linked to the ad account and allocate it to your respective MediaPath account.
- Select the Instagram Account linked to the ad account.
- Headline positions vary by placement. (max. 25 characters).
- Text ad placements vary (max. 90 characters). You can use @ to tag Facebook Profiles or Pages.
- Cover Media (image or video) displays the first media asset from the fullscreen Instant Experience (explained in the next section). The preview will only be displayed once you have created the Instant Experience.
4. Instant Experience #
Instant Experience is a fullscreen experience that opens when your prospects click your ad on a mobile device. An Instant Experience is created to visually highlight your brands’ products and services.
The below is explained in detail:
4(a) Create new (i. Custom ii. Product Set iii. Product List)
4(b) Use Existing
4(a) Create a new Instant Experience.
#
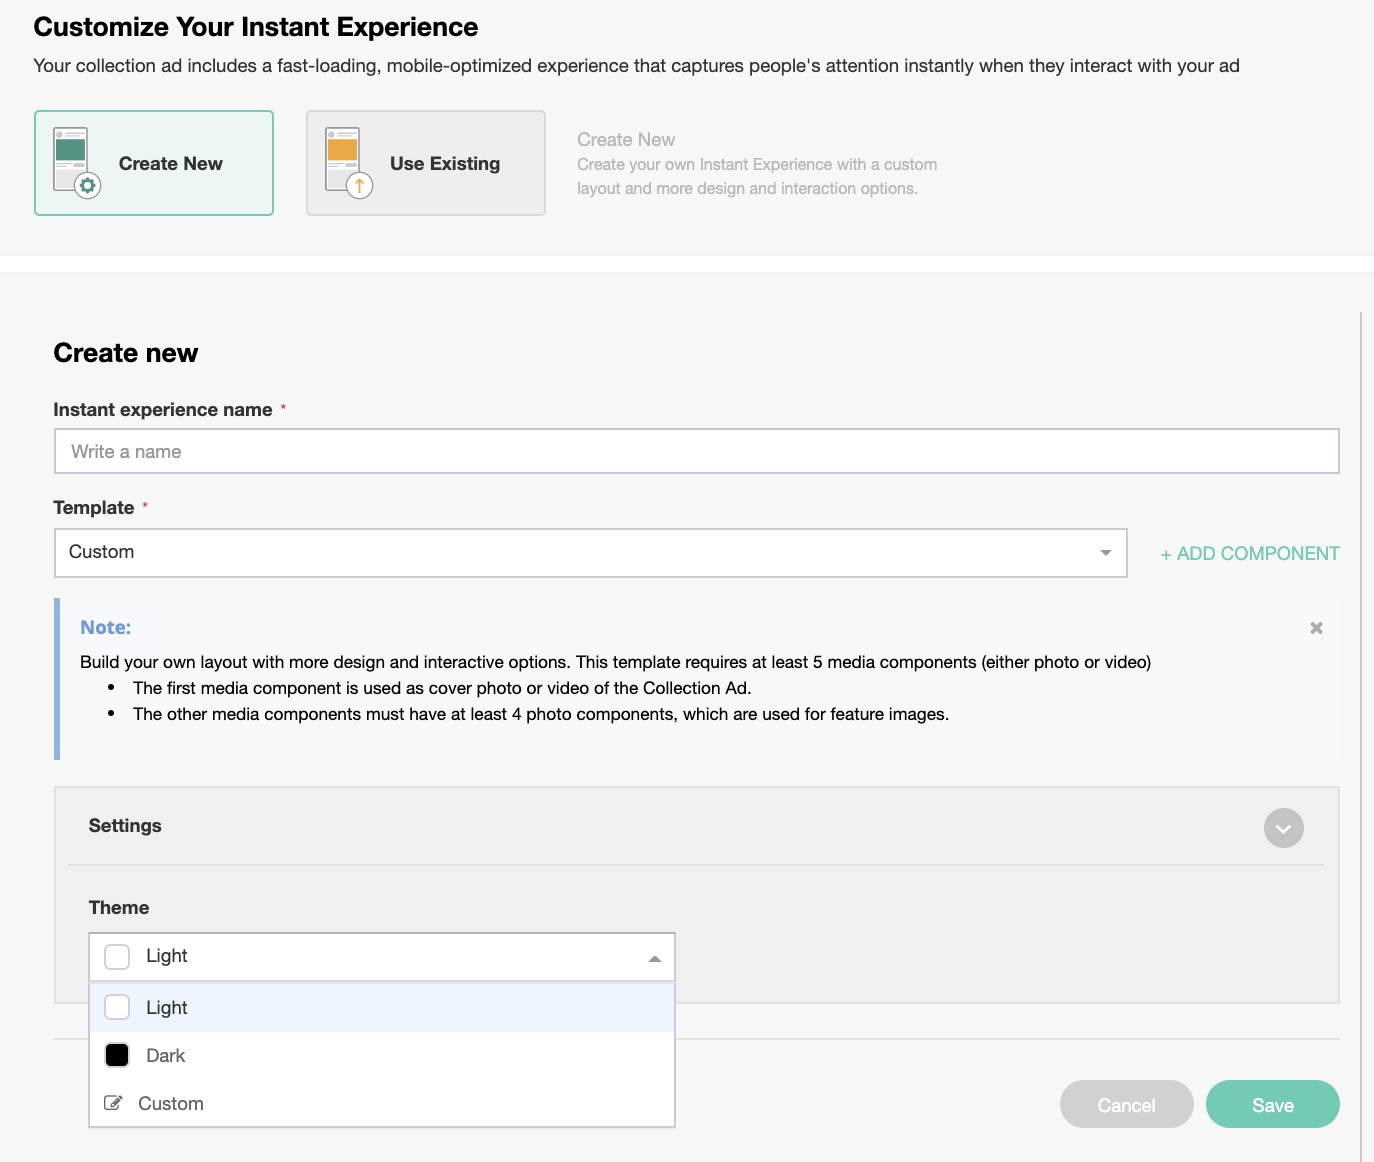
- Name your Instant Experience.
- Adjust your Settings by changing the theme of your Instant Experience. You can choose Dark, Light, or customize your own theme. Once you select a theme, it will be displayed in the preview section.
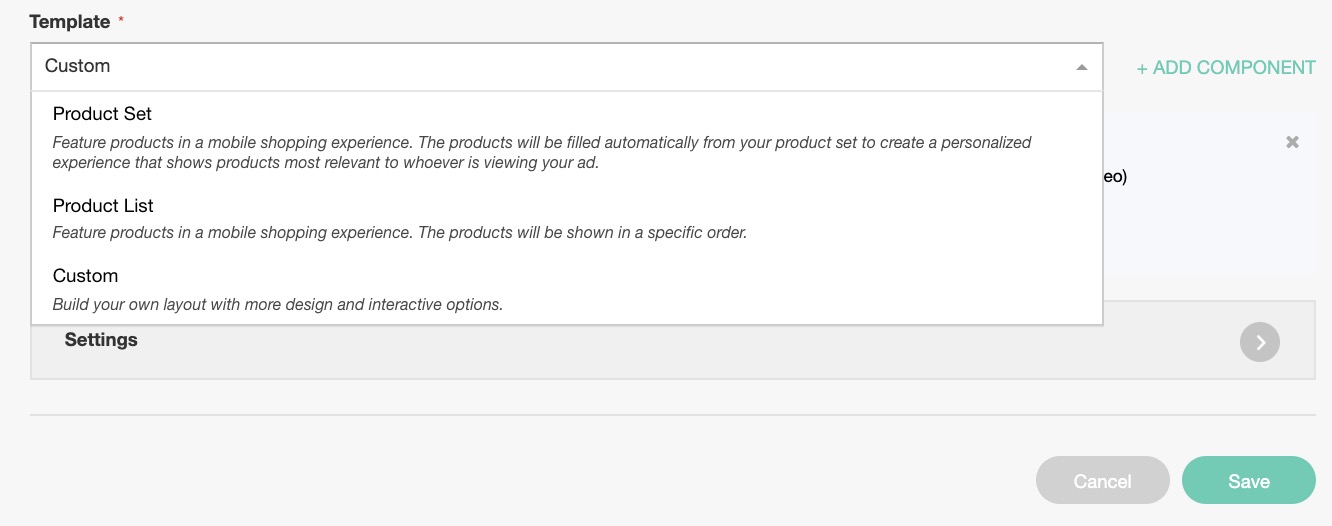
- Templates: Select from the following 3 templates.
- Custom Template (default option)
- Product Set
- Product List
- Once you have finished creating your new Instant Experience, you can proceed to review, remove, or duplicate the form.
4(a)(i) Custom Template #
Custom templates offer an extended selection of design options, providing you with greater creative freedom to craft an Instant Experience tailored to your targeting goals.
To create a custom template, click on the + Add Components button to bring up a list of all media component types.
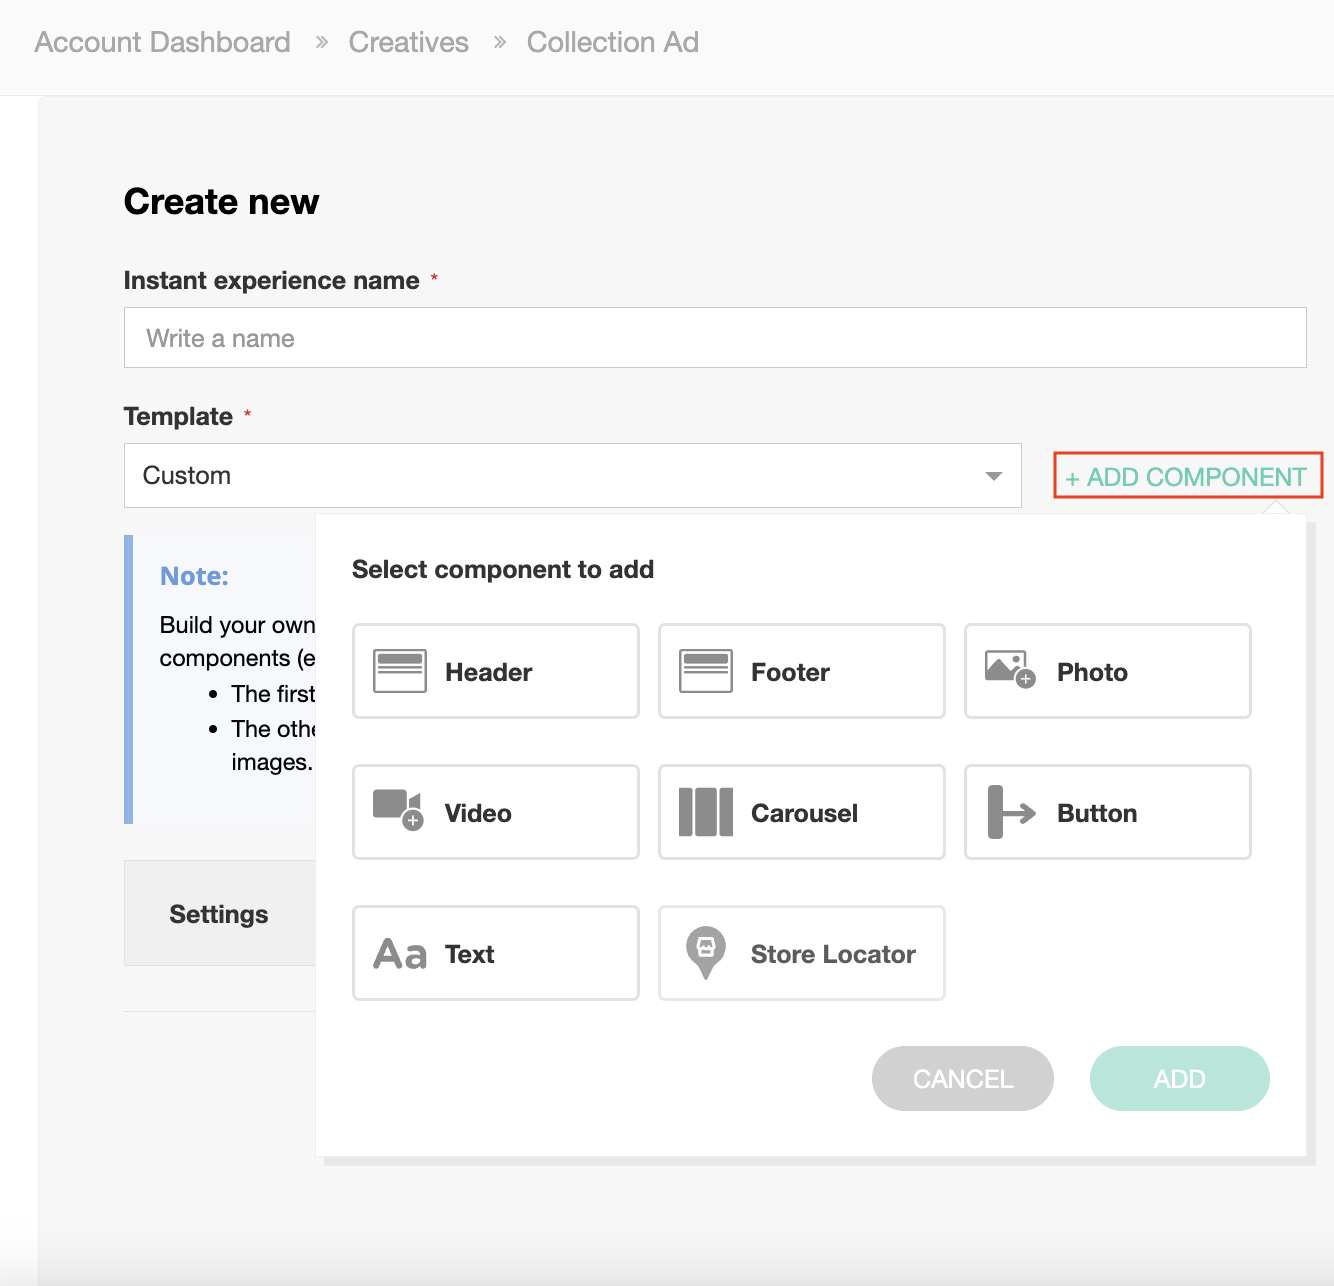
- A custom template requires at least 5 media components.
- Component padding under advanced options refers to the spacing adjustment you wish to have between each added component for your Instant Experience. Eg. if 0 is selected there will be no gap between the corresponding top and bottom components.
| Type Of Media Component | Description |
| Button Component | Button components provide your prospects with the option to take an action by adding a button (call-to-action) to your Instant Experience. Design OptionsFont: Font size, font type, & placementDestination URL: The website, app store, or Instant Experience that a user will be redirected to after clicking the button. Style:Select the button style (outline or fill)Background colorOption to fix the button to the bottom of the screenset the advanced setting for the button component; you can delete the button component too.Advanced Settings: Adjust the component padding.You can remove the component at any time. |
| Carousel Component | Carousel components allow you to showcase multiple Design OptionsImage Upload: Upload 2-10 images for carousel format. If the images are not the same size, they will be cropped to match the first image.Layout Type: Fit to Width, or Fit to Height.Destination URL: The website, app store, or Instant Experience that a user will be redirected to after clicking the button. Advanced Settings: Adjust the component padding.Replace images at any timeDelete the image(s) by clicking on the X buttonRemove the entire component at any point in time |
| Photo Component | Photo Components allow you to introduce your brand, product, or service with an eye-catching image by creating a slideshow using up to 10 photos.Design OptionsLayout Type: Fit to width (linkable), Fit to width (tap to expand), or Fit to height (tilt to the pan). Destination URL: The website, app store, or Instant Experience that a user will be redirected to after clicking the button. Advanced Settings: Adjust the component padding.Replace images at any timeDelete the image(s) by clicking on the X buttonRemove the entire component at any point in time |
| Text Component | Design OptionsText: Add your desired text for the ad and select the layout for the text.Font: Select the font size, font type, and placement.Style: Select the background color for the text. You can input a background color code.Advanced Settings: Adjust the component padding.You can remove the component at any time. |
| Video Component | Design OptionsVideo Upload: Upload a video file (.mp4 or .mov). It is recommended to keep videos under 2 minutes with the use of captions to keep your prospects engaged without audio. You can add up to 10 videos to your Instant Experience. You can upload the video from the media library.Layout Type: Select either one of the two options for layout; Fit to width or Fit to height.Advanced Settings: Adjust the component padding.Destination URL will not be available for the video component.Remove the entire component at any point in time |
| Header Component | The header component allows you to add a header (logo) for your collection ad.Design OptionsLogo: Upload a logo for your Instant Experience. For the best results, images should be 882 x 66 pixels.Style: Set a background color for your logo.You can use only one header per Instant Experience. |
| Footer Component | Design OptionsDestination URL: The website, app store, or Instant Experience that a user will be redirected to after clicking the button. You can remove the entire component whenever you want. |
| Store Locator Component | Coming soon. |
#
PRE-REQUISITES FOR PRODUCT SET & PRODUCT LIST #
- When your catalog has four or more products and you want to display these products in a grid so that prospects can browse them in one place.
- You will have one main video or image as the highlight, followed by related products.
- You wish to drive prospects to your website or app to make an instant purchase.
- You can dynamically organize products from your catalog into relevant groups, such as “Suggested for you” and “Most viewed”.
You will need to:
- First, select a template as the Product List or Product Set.
- Create a feed from MediaPath curator and create your catalogs. You can only use the Ecommerce Catalog (Product Type) for collection ads.
4(a)(ii) Product Set Template #
This template is to create a personalized experience that shows products most relevant to prospects viewing your ad. This template will automatically fill in from your created/selected catalog. Your ad will need at least four products in stock to run. Rejected products will not be displayed.
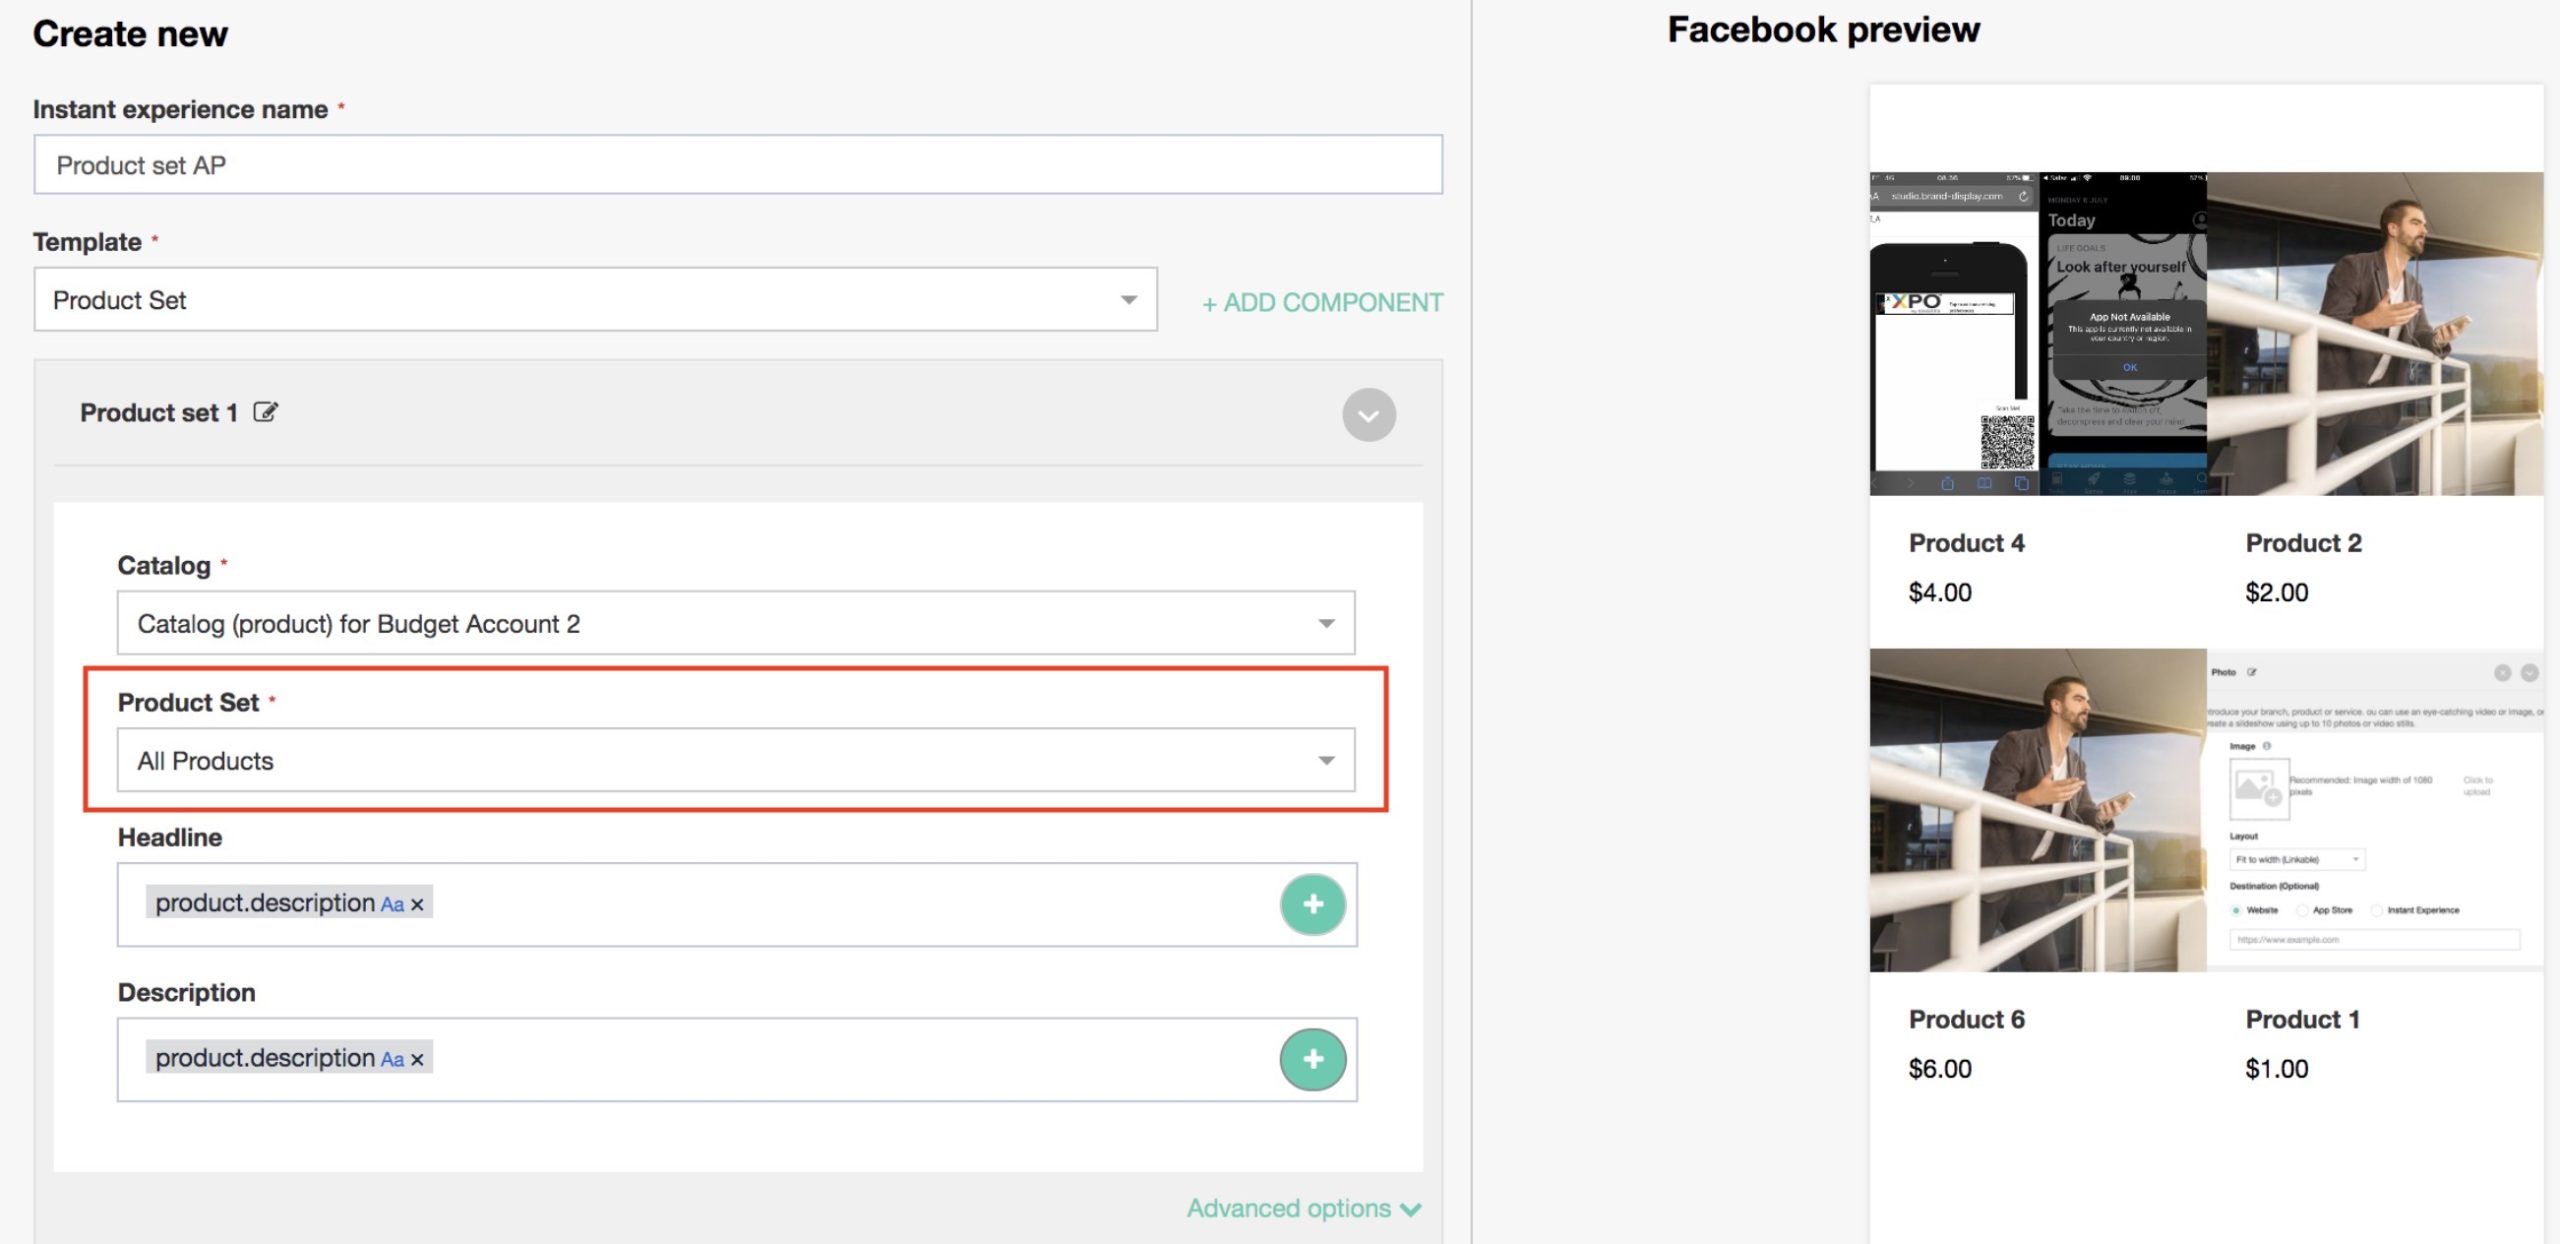
- You can change the label name “Product Set” by clicking on the edit button.
- Once you select Product Set you will then need to select a catalog from the dropdown list (as mentioned in pre-requisite 3).
- You can choose any type of e-commerce catalog to create an Instant Experience using a Product Set.
- Apart from the products, you can also add more components by clicking on + Add component.
- From your selected catalog feed, details such as price, description, title, product ID, etc. will be previewed while creating the Product Set. For instance, in the above image, Headline and Description fields are auto-filled as details are fetched from the selected catalog.
- With Product Set, you can add advanced settings too.
4(a)(iii) Product List Template #
Select this option if you want to show your products in a specific order instead of a catalog. You will need at least four products to run the ad. Rejected products will not be displayed.
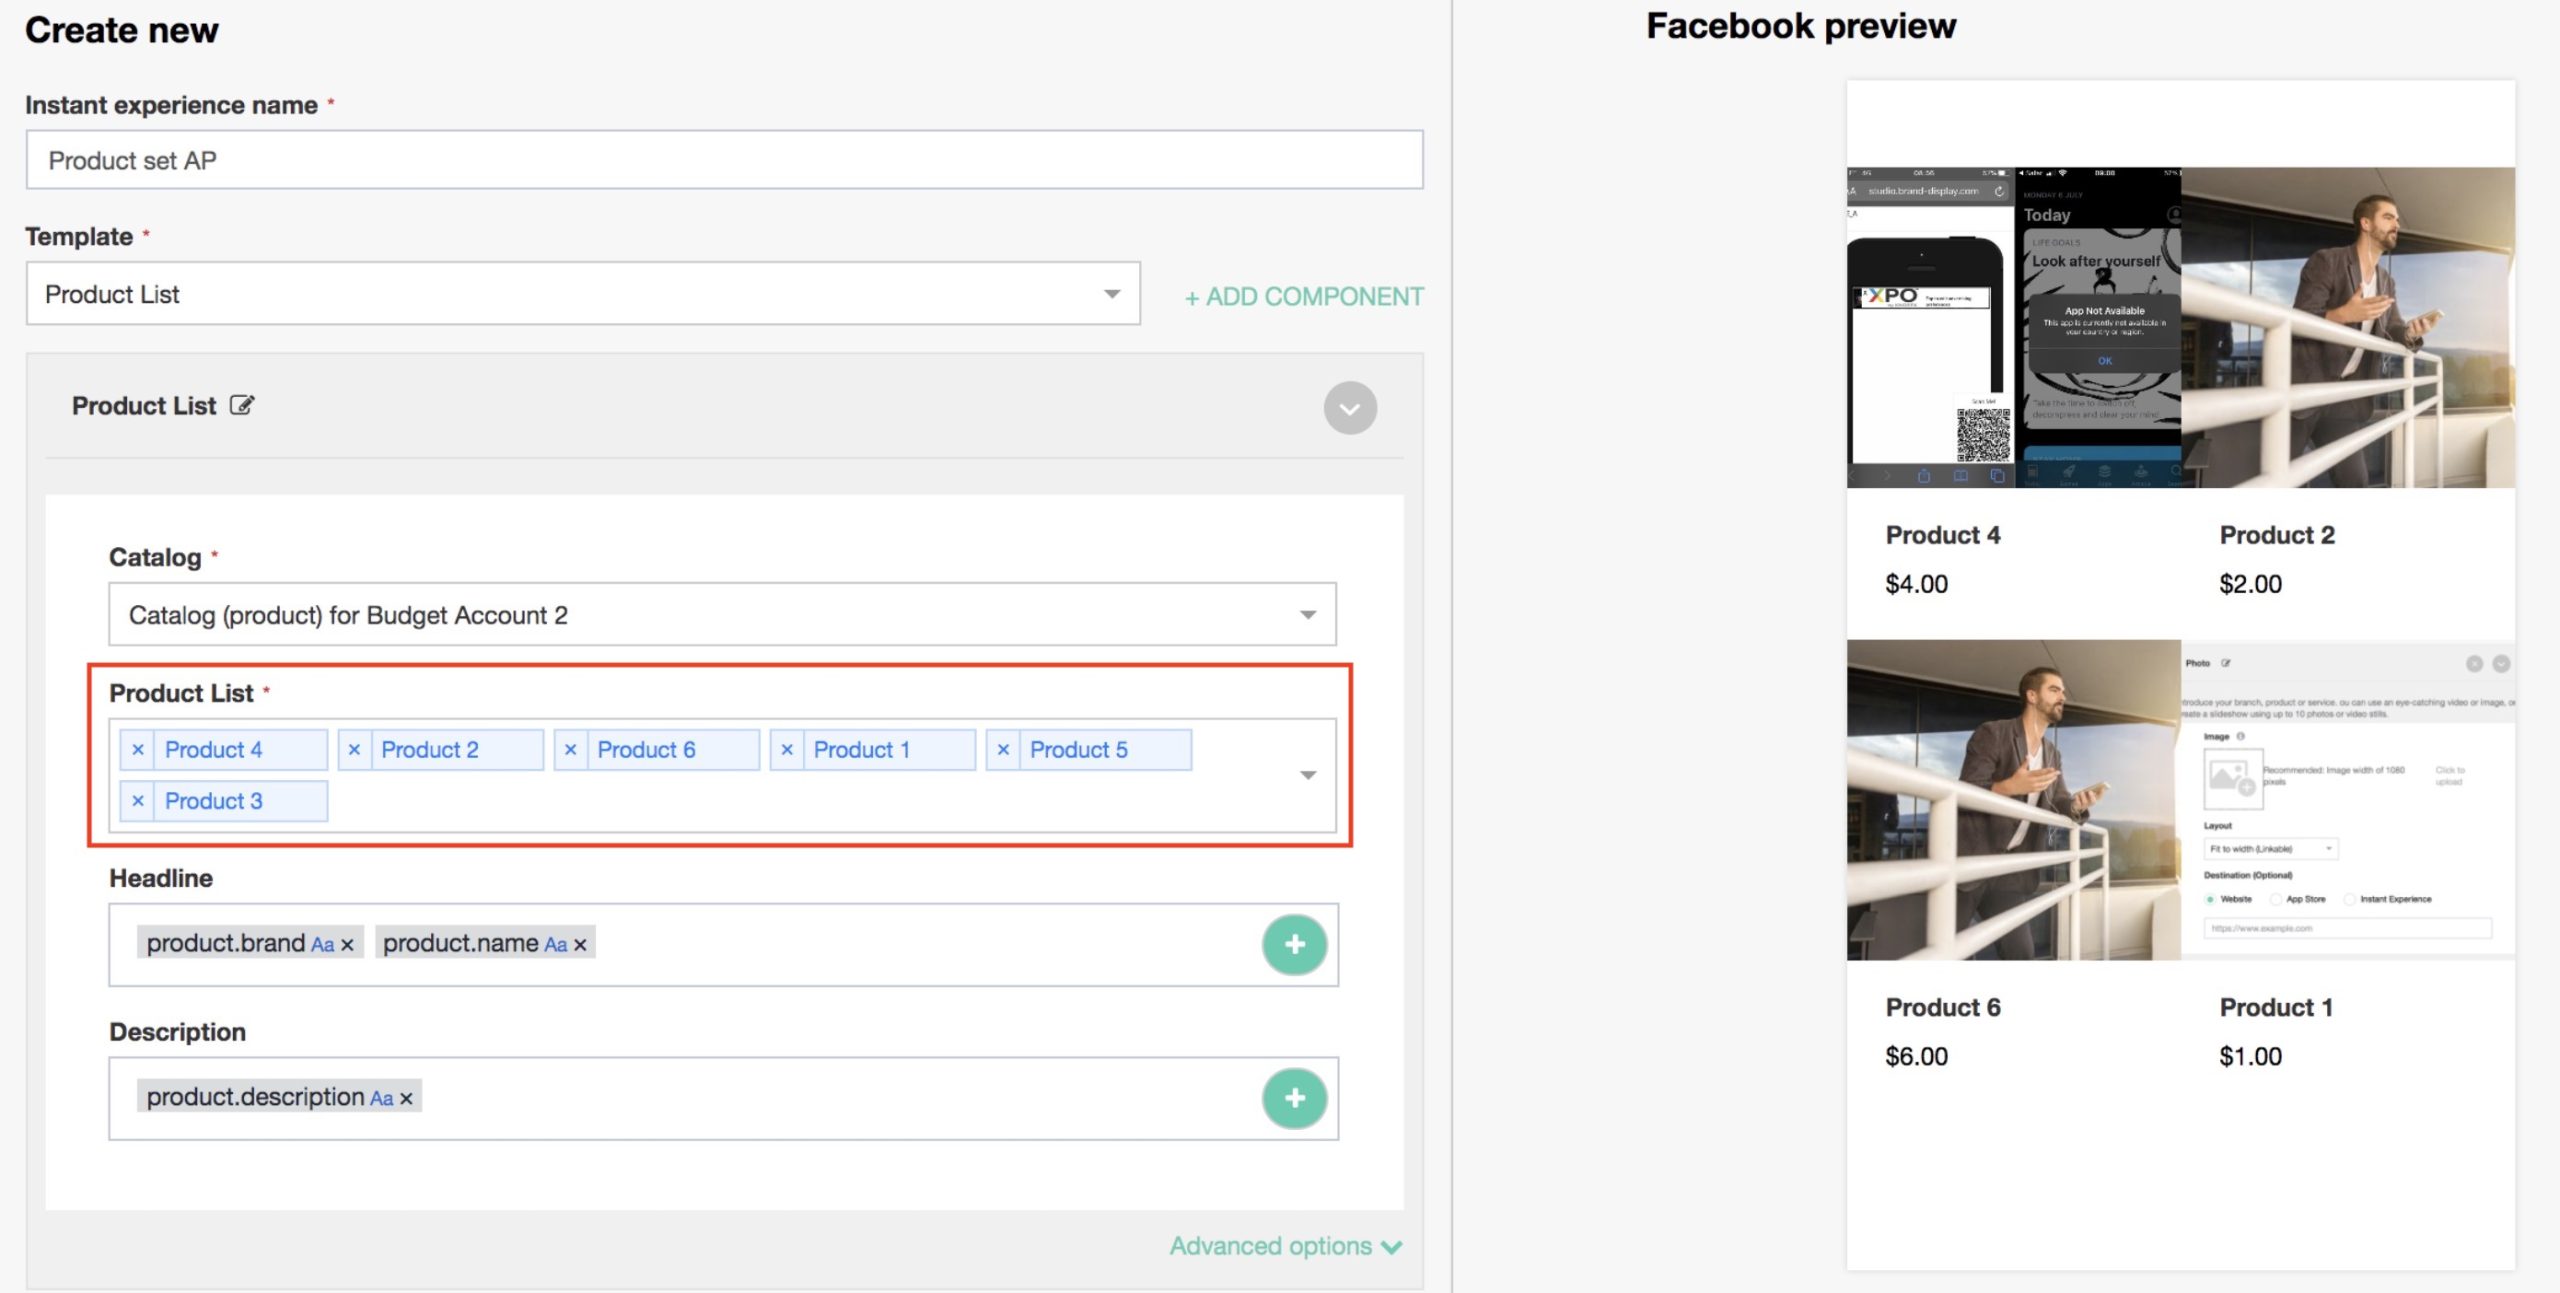
- You can change the label name “Product List” by clicking on the edit button.
- Once you select Product List you will then need to select a catalog and products from the dropdown list (as mentioned in pre-requisite 3).
- You can choose any type of e-commerce catalog to create an Instant Experience using a Product List.
- In the Product List, you can only select products included in the catalog. If you created a feed with 10 products, all of them will be available in the dropdown list.
- Apart from the products, you can also add more components by clicking on + Add component.
- From your selected catalog feed, details such as price, description, title, name, product ID, etc. will be previewed while creating the Product List. For instance, in the above image, Headline, and Description fields are added from details fetched from the selected catalog feed.
- With Product List, you can add advanced settings.
4(b) Use An Existing Instant Experience. #
- You can select an Instant Experience from the dropdown list.
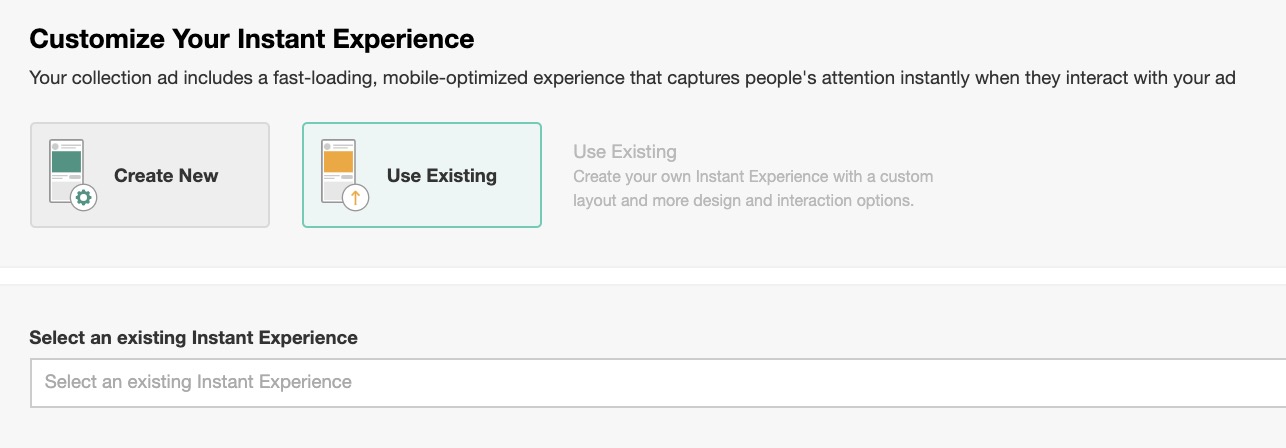
- Once selected, the cover photo and featured image in the new feed will be displayed.
- You can edit and duplicate the form by clicking on Review. On the review page, select Duplicate. To remove the selected Instant Experience, click on Remove.
- You can add and/or remove media components and also change the settings and theme.
- Once done, click Save. The new, updated copy of your existing Instant Experience will be saved in the list.
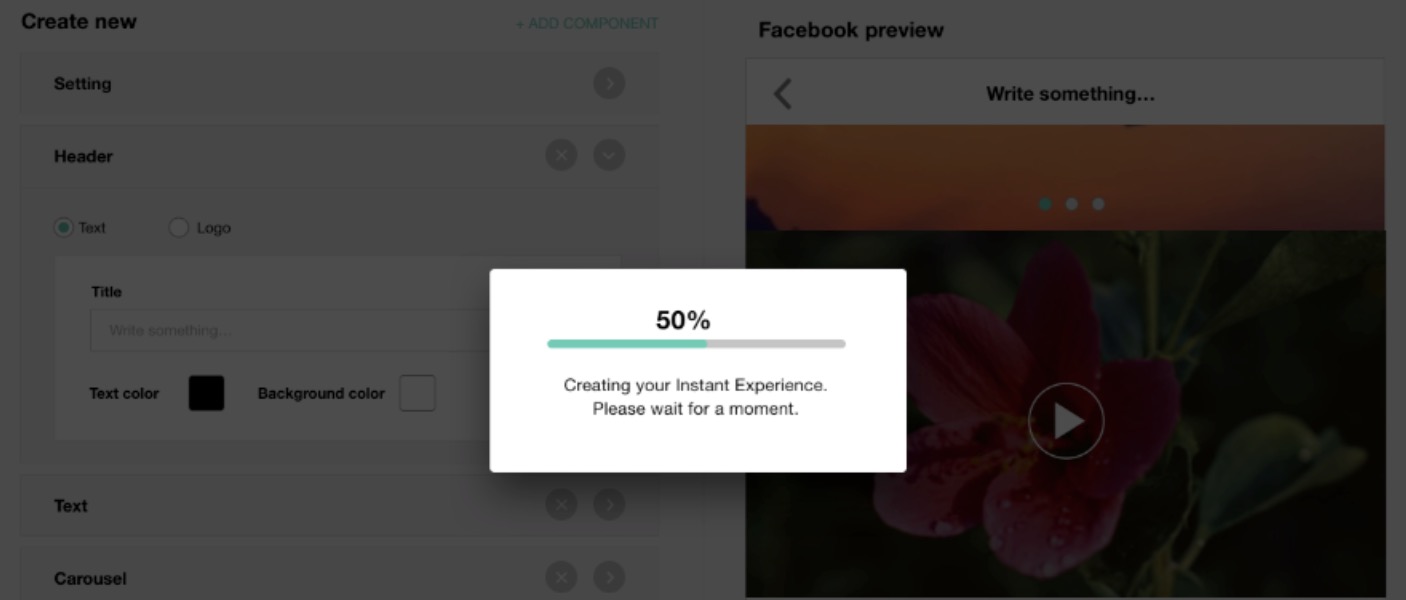
5. Preview your Instant Experience. #
- You can have a Facebook preview of your Instant Experience.
6. Preview your final Collection ad. #
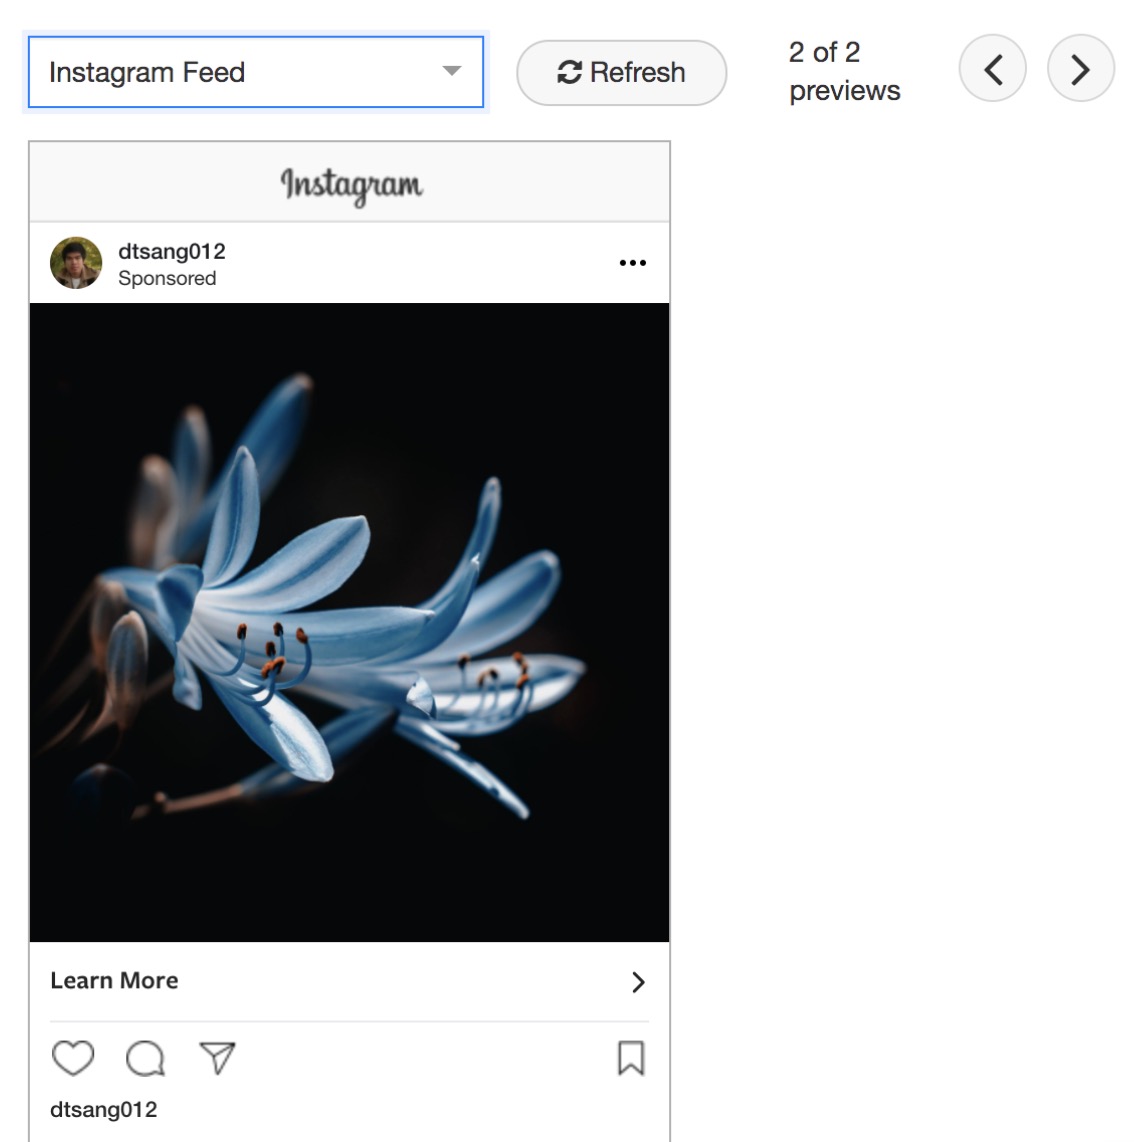
Once you have completed the design form and completed the Instant Experience, you can preview your final Collection Ad in the following formats:
- Mobile News Feed
- Instagram Feed
7. Link your Collection ads to your Facebook ad groups. #
- You will be able to:
- edit the creative form and creative design like headlines and text.
- clone Collection ads across ad accounts along with the Instant Experience.
- share the preview of your collection ad by sending a link.
- archive the Collection ad.
- design a new or use an existing Collection ad via Quick Launch form and successfully publish the campaign.
- sync Collection ads from Facebook Business Manager to MediaPath.